Below you will find our natural stone installation guide, this should be used to understand the important details when attempting to install stone tiles and slabs.
1. Introduction
2. Preparation
3. Layout
4. Cutting and Fixing
5. Sealing and Grouting
6. Deep Cleaning and Problem Solving
7. External Use
8. Trouble Shooting
1. Introduction Natural stone floor and wall tiles will enhance and improve the appearance of your home and in certain circumstances improve your standard of living by the ease in which they can be cleaned reducing the amount of dust mites and pollen particles that can result in allergies. The information contained within this guide has been produced in good faith and is to be used as a guide and general overview of the various stages involved in the laying of stone. It is recommended that additional professional advice be sought if the tiles are to be laid successfully. The Stone Collection can offer advice and guidance but takes no responsibility for problems arising as the result of customers simply following the information contained herein. Only the products that Stone Collection recommends for fixing and maintaining the tiles are referred to in this guide. Where possible the directions for use of each product should be carefully followed (this information can be found on the back of the bottles of sealants and bags of adhesive). For more information please ask for a technical data sheet on the relevant product. Where alternative fixing products are being used, their compatibility should be checked with the supplier or manufacturer of the materials. Should you require any further tiles, sealants or adhesives or if you have any questions relating to the products that you have purchased, please do not hesitate to contact us.
Technical helpline 01322 387 315
Products supplied by Stone Collection
1.1 Adhesives –
ARDEX cement based adhesive for bed thicknesses from 3 to 20 mm, with good deformability, good adhesion strength and no vertical slip for ceramic tiles and stone materials. Applications: Interior and exterior bonding of ceramic tile and natural stone floors and walls (as long as they are not absorbent) on conventional substrates such as:
Cement screeds and under-floor heating installations.
Cement renders or lime and cement mortar.
Gypsum boards.
Brick walls and blocks.
Concrete with more than 4 months curing time.
ARDEX Thick Bed Adhesive is suitable for bonding small and large sizes on uneven substrates without having to smooth the flooring beforehand and for the installation of tiles (even heavy) with no vertical slip. Also suitable where tiles have to be laid onto existing floor and wall tiles.
1.2 Grout –
MAPEI fine joint grout is the latest innovation from Mapei, it is the ultimate solution for perfect grout joints. Free from uneven colour and efflorescence, the grout remains easy to keep clean and will not support mould growth. Mapei’s cutting edge Research & Development team has excelled with this new grout. This new grout is suitable for use in interior and exterior installations for grouting between many types of ceramic and natural stone tiles. Fine Joint grout is ideal for use on floors subject to frequent use such as airports, shopping malls, restaurants, bars etc. Its high durability makes it the perfect choice for use in swimming pools and externally on balconies, terraces and facades.
1.3 Sealants –
Lithofin MN Stainstop special impregnating sealers optimally protect absorbent, stain-sensitive natural and artificial stone surfaces. Largely prevents the penetration of oil, grease, and water and makes further maintenance easier. Highly recommended in kitchens and bathrooms. No health concerns once dry, according to FMPA report. Also suitable for polished surfaces ready-to-use for indoor and outdoor use no gloss long-term effect
Coverage: ca.7-15m2/L Packaging: 1L, 5L
2. Preparation
2.1 Preparation Introduction
It is of great importance that the sub floor is adequately prepared for the tiling process. This involves ensuring that the floor is level, clean and dry. Throughout the preparation process the tiles should be stored in a clean and dry area.
2.2 Types of Sub floor
The most suitable sub-floor for tiling is either a concrete, sand and cement screed or a sand and cement render. However, tiles may be laid on other surfaces such as timber floors. If the original floor is old tiles, vinyl, cork, linoleum, or woodblock, then it is necessary to remove this before laying the tiles, making sure the ground is clean, level and any old adhesive removed. Any irregularities in the floor may be evened out by the application of adhesive during the fixing process. Where larger holes and bumps exist, a leveling compound should be used.
2.2.1 Concrete Floors & Sand & Cement Screeds
Please Note that a new concrete screed should be left for a period of at least six weeks before the tiles are laid. A new sand and cement screed or sand and cement render should be left for a period of at least two weeks. Depending on weather and site conditions, further time may be necessary. It is advisable to test the screed and render for damp before fitting the stone. A movement matting such as Schluter Ditra Matting should then be glued down to prevent any further floor movement that could be caused through shrinkage.
2.2.2 Timber Floors
Timber floors may also be used as long as they are strong and stable enough to withstand the additional load. Timber floors can be strengthened by laying 2 sheets of 12.5mm WBP plywood in opposite directions on top of the joists, and with the joints broken bonded. Joists should be strengthened and no further than 300mm apart. Sheets should be screwed down at 200mm intervals. A movement matting such as Schluter Ditra Matting should then be glued down to prevent any further floor movement that could be caused through shrinkage. A flexible adhesive and a flexible grout should be used. (See Cutting and Fixing the Tiles).
2.3 Under Floor Heated floors
Natural stones are very good at storing and dispersing heat and hence work very well with under floor heating. It is important to ensure that this is turned off when the tiles are being laid and that a flexible adhesive and a flexible grout are used. (See Cutting and Fixing the Tiles) It is also advised to use a movement matting such as Schluter Ditra Matting to prevent any further floor movement that could be caused through shrinkage.
2.4 Finished Floor Level
It is important to remember that the finished floor level will be raised by the thickness of the tile plus approximately 4mm for the adhesive. Thus some doors may need trimming and timber threshold strips may be required to solve of problem of varying levels of adjoining rooms.
2.5 Types of walls
The most suitable walls are solid concrete rendered walls; the weight of stone tiles needs to be taken into consideration, the average weight of most stone tiles is 25 – 30 kg/m2, and most stone slabs weigh between, 50 and 80 kg.m2. In most cases it is advisable to use tile backer boards, they are lightweight, waterproof and can support the weight of stone tiles. Walls can be strengthened by laying 18mm thick plywood or WBP plywood over the entire surface, followed by a 10mm layer of tile backer board. A flexible adhesive and a flexible grout should always be used.
3. Layout
3.1 Introduction
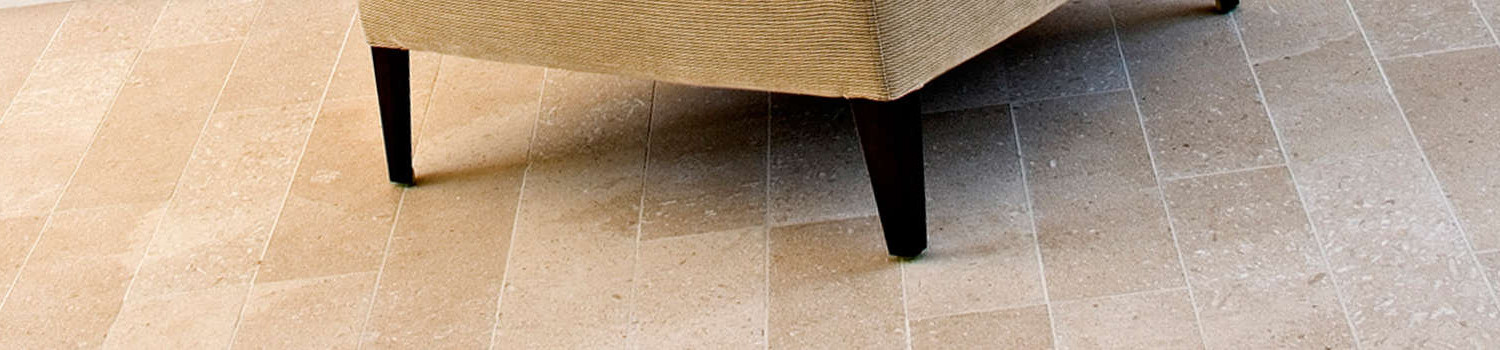
Before commencing the work it is important to consider the shape of the room to be tiled and hence the layout of the tiles themselves. The tiles can be laid either in a traditional straight fashion or, if desired, brick fashioned (half bonded) at an angle in a diamond pattern resulting perhaps in a more aesthetically pleasing finish to the floor. To enhance the character of the room further, either a border or a profile may be added.
3.2 Floor Tiling Process
To begin, find the centre of the room and create a centre line from one end of the room (the end at which the door is located) to the other (the end opposite to the door) using a chalk line. Once the midpoint of this centre line is ascertained, the tiles should be laid without being fixed, so as to be able to see where the last whole tile ends. This should be done in both directions, if the gap at the end is less than half a tile, move the tiles away from the centre line until you achieve the correct gap, then mark the floor where the first tile will start. When the actual tiling process commences, it is good practice to start at the point furthest from the door, the principal being that one does not need to step on the newly laid tiles. It is important to remember to leave a sufficient gap for the grout joint. (See Cutting and Fixing the Tiles)
3.3 Wall Tiling Process
Similar to floor tiling a start point must be ascertained, if the floor is level and you are following the line of the tiles on the walls. Use a spirit level and mark a vertical line on the wall with a pencil from the edge of the centre positioned floor tile. Then measure up the wall and draw a vertical line around the room at the correct height for an equal distribution of wall tile between the floor and the ceiling. Remember to take into account any windowsills, and the height of the bath to ensure you do not leave too many small cuts.
4. Cutting and Fixing
4.1 Before Tiling
VERY IMPORTANT: Before tiling it is important to ensure all the tiles are COMPLETELY DRY and free from dust both on the face of the tile and the one to be adhered. Mix the tiles to ensure that any colour, shade or batch differences are mixed to ensure a random and even distribution of any irregularities in the tiles colour and tone. These two processes are important to prevent the blocking of colours forming from the natural variation in the tile when laying them. Wet tiles should be allowed to dry because colour variation between tiles is less visible and the adhesives will not adhere correctly to wet or damp tiles.
4.2 Cutting
It is most likely that it will be necessary to cut tiles during the fixing process. Any broken or damaged tiles should be put aside and used for this purpose. Where there is a large amount of cutting to be done, a water-cooled diamond cutter should be used which will make the job much easier, and leave a very clean cut. Tiles can also be cut using an angle grinder; this may leave a rough edge but is ideal if curved cuts are needed. Both of these may be purchased from ourselves or can be rented from a hire shop.
4.3 Fixing
Although a subjective decision, it is suggested that a grout joint of approximately 2-3mm is allowed when laying stone, a wider joint may be used if required depending on the type of stone. When tiling on a screed the tiles should then be fixed to the floor using ARDEX Flexible white adhesive to ensure the surface of the tile does not become stained. The use of a sand and cement should be avoided as the tiles will take considerably longer to dry out and this may encourage efflorescence. Where the tiles are being laid on to a wooden floor, or where under floor heating is being used, it will be necessary to use ARDEX Flexible white adhesive. Where the tiles are being laid outside or need to set quickly, it is important to use ARDEX Rapid Flexible adhesive. The adhesive should be spread over a small area (e.g. one square metre) of the floor to a depth of between 5 – 10mm thickness, using a square notched adhesive trowel. The direction of the adhesive should always be the same to allow air to be dispersed when the tile is bedded. Deep lugs or keys on the back of the tiles should also be filled with adhesive before the tiles are fixed. It is also advisable to butter the back of the tile to ensure a good key. Mosaics require a smaller bed of adhesive approx 3 – 6 mm thick. The tile should then be firmly bedded into the adhesive on the subfloor, using a small twisting-like motion to ensure that there are no air pockets under the tile. This process should be repeated, remembering to leave a gap for the grout joints. It is important to ensure that the tiles are laid evenly which can be done using a spirit level. Any adhesive that is accidentally placed on the surface of the tile should be removed using a grout sponge. Always ensure the tiles are cleaned using Lithofin MN Power Clean.
5. Sealing and Grouting
5.1 Introduction
VERY IMPORTANT: As the tiles are natural, it will be necessary to apply a Primary Seal before the floor is grouted. A Secondary Seal may then be applied after the grouting process is completed. It is very important that the floor is clean, dry and completely free from grout stain or grease before the secondary coat is applied. For best results the temperature in the room should not be too low, humidity in the air not too high and strong sunlight should be avoided. Please Note. In some instances the fumes from certain sealants may be unpleasant and cause breathing difficulties for the young and old. It is important to ensure that there is good air-circulation and that an appropriate respirator is worn.
5.2 Grouting
The grouting process should commence approximately 12 to 24 hours after the tiles have been treated with a Primary Seal of Lithofin MN Stain Stop. This will reduce the porosity of the tiles and discourage staining. ARDEX Fine Flex grouts should be used in the case of stone. Prior to grouting, the joints should be filled by either using a pointing process or by making up a slurry grout mixture and working the grout into the joints using a squeegee. In the case of unfilled or tumbled travertine, a slurry grout is recommended so as to fill in any holes in the surface of the tile. Please note that only a small area (e.g. one or two square metre) should be grouted at a time before any surplus grout is removed and the grouted area cleaned using a wet grout sponge. Care should be taken not to spread the grout unnecessarily over the tiles, as it may be difficult to remove the residue when dried. On completion of the grouting, the floor should be wiped over again to ensure that all grout residues has been removed. Once the grout has dried, the floor should be brushed to remove any dust particles. If any excess grout remains on the floor after it has been cleaned, Lithofin Power Clean may be used to remove any stubborn marks.
5.3 Sealing Natural Stone
5.3.1 Matt Finish
In most cases, Lithofin MN Stain-Stop can be used to seal stone. As these sealers will not change the colour of the material, a product such as Lithofin Colour Intensifier should be used where one wishes to intensify the colour of the stone. Depending upon the material being treated, it may be necessary to apply more than two coats of the sealer to the floor to achieve saturation.
5.3.1.1 Primary Seal
The primary seal should be applied as evenly as possible before the floor is grouted. It is important to ensure that the tiles are completely dry, clean and stain free. The coat should be applied using a brush, roller or cloth. It is most important that all the sealer is absorbed into the tile. Any excess sealant should be wiped off before it is allowed to dry on the surface.
5.3.1.2 Secondary Seal
The secondary seal should be applied in the same way as the primary seal, but at right angles. Again, it is most important that all the Sealer is absorbed into the tile. Any excess sealant should be wiped off before it is allowed to dry on the surface. The tiles should be grouted to SATURATION to ensure complete coverage of the sealant. (Apply as many coats as is necessary to achieve saturation).
5.3.1.3 Polished Finish
Ensure surface is clean, dry and free from contamination. If necessary, first clean surfaces with Lithofin Easycare and allow to fully dry. Apply thinly and uniformly using a soft cloth or sponge. Within 20 minutes, whilst the sealer is still wet on the surface, buff well using a clean dry cloth or buffing machine. Leave to dry for 4 hours and then on more porous surfaces apply a second coat using the same method. It is important to remember to remove any excess from the surface and buff well between each coat. Do not apply in temperatures exceeding 25°C. Ensure under-floor heating is switched off. Over applied and un-buffed sealer will dry and leave a greasy residue on the surface. To remove, apply a little more sealer and then buff immediately. If you are unsure of correct application methods, test on an inconspicuous area, prior to general application. Treated areas should be dry enough to walk on after about 4 hours but will take 3 days to become fully water resistant.
5.3.1.4 Colour Intensifier
It is most important that all the Lithofin MN Stain-Stop is absorbed into the tile before applying the Lithofin Colour Intensifier. The coat should be applied using a brush, roller or cloth. Apply as many coats as is necessary to ascertain the required finish.
5.3.1.5 Maintenance
Natural Stone sealed with Lithofin MN Stain-Stop should be cleaned using Lithofin Easy-Care. Lithofin Wexa may be used to remove any grease, oil or ingrained dirt.
5.4 Sealing Slate
There are two options available: a matt finish, or a gloss finish.
5.4.1 Matt Finish
For a matt finish, Lithofin MN Stain-Stop should be applied. Depending upon the material being treated, it may be necessary to apply more than two coats of the Lithofin Stain-Stop to the floor.
5.4.1.1 Primary Seal
The primary seal should be applied as evenly as possible before the floor is grouted. It is important to ensure that the tiles are completely dry, clean and stain free. The coat should be applied using a brush, roller or cloth. It is most important that all the Lithofin MN Stain-Stop is absorbed into the tile. Any excess sealant should be wiped off before it is allowed to dry on the surface.
5.4.1.2 Secondary Seal
The secondary seal should be applied in the same way as the primary seal, but at right angles. Again, It is most important that all the Lithofin MN Stain-Stop is absorbed into the tile. Any excess sealant should be wiped off before it is allowed to dry on the surface. The tiles should be sealed to saturation to ensure complete coverage of the sealant. (Apply as many coats as is necessary to achieve saturation).
5.4.1.3 Maintenance
Slate sealed with Lithofin MN Stain-Stop should be cleaned using Lithofin Easy-Care. Lithofin Wexa may be used to remove any grease, oil or ingrained dirt.
5.4.2 Gloss Look Finish
For more of a gloss look, Lithofin Slate-Seal should be used. In most cases, two coats of Lithofin Slate-Seal should be sufficient.
5.4.2.1 Primary Seal
The primary seal should be applied as evenly as possible before the floor is grouted. It is important to ensure that the tiles are completely dry, clean and stain free. A reasonably thick coat should be applied using a brush, roller or cloth. On less absorbent surfaces, just a thin coat should be applied. It is important not to walk on the floor until it is completely dry.
5.4.2.2 Secondary Seal
The secondary seal should be applied in the same way as the primary seal, but at right angles.
5.4.2.3 Maintenance
Slate sealed with Lithofin Slate-Seal should be cleaned using Lithofin Easy-Care. Lithofin Wexa may be used to remove any grease, oil or ingrained dirt. For further technical information or general support with sealing enquiries contact Lithofin technical helpline on 01962 732 126.
6. Deep Cleaning & Problem Solving
6.1 Deep Cleaning
After some years, if the floor has become particularly dirty, Lithofin Wexa may be used to remove grease and grime and to strip off old coats of sealants.
6.2 Problem Solving
Should anything be spilt on the tiles during their day to day use, it should be quickly removed using a damp cloth and may be cleaned using Lithofin Wexa. Any remaining stubborn marks may be removed using Lithofin Oil-Ex.
6.3 Damaged Areas
Caution should be taken to avoid dragging furniture over the floor, as this may damage the tiles. Where this does occur, the damaged area should be re sealed to prevent further damage.
7. External Use
7.1 Introduction
Where tiles are being used outside, their compatibility should be thoroughly checked and reference should be made to their external suitability.
When tiling externally care should be taken not to tile in temperatures below 10°C. ARDEX adhesives can be used as low as 5°C with a primer but it is always advisable to wait for warmer conditions to aid the drying of the adhesive. 30mm thick stones are most suited for external use however tiles of 20mm thickness can be used if they are not totally exposed to the elements. It is recommended that the tiles be laid in such a way as to allow water to run off the surface. Where natural stone is being used outside, Lithofin MN Stain Stop should be used as a sealant.
8. Trouble Shooting
8.1 Possible Problems
Do not use a deeper bed of adhesive than is recommended by the manufacturer (normally up to 10 mm). If a thick bed of adhesive is required (up to a maximum of 25mm).Do not dot and dab the back of the tiles as this may result in shadow lines being visible behind the tile. Do not use grey adhesive on light coloured tiles. Do not grout the tiles before applying the primary seal. Always use flexible adhesive and grout with under floor heating and wooden substrates.
Always follow the manufacturers instructions.
Ensure the substrate can take the weight of the tiles.
Ensure that all substrates are sealed with the correct sealer prior to tiling.